



Floor sanding is one of the most effective ways to restore old or worn timber floors. It can revive the look of a home, remove surface damage and prepare flooring for a fresh finish. When done correctly, it improves both aesthetics and durability. Many homeowners are unsure where to start, but understanding the basics can make the process more manageable and less intimidating.
Before any sanding begins, it’s important to assess the condition of the floor. Timber that is cupped, cracked or severely damaged may require repairs or replacement of individual boards. Ensuring the surface is clean and free from furniture, nails and debris provides a safer and more efficient sanding experience.
How do you prepare a floor for sanding?
Preparation is often the most time-consuming step, but it sets the foundation for a quality result. All furniture, rugs and fixtures should be removed from the room. Any protruding nails or staples need to be punched below the surface to avoid damaging sanding equipment.
Thorough cleaning helps remove dust, small objects and grime. Some floors may need minor repairs, such as filling gaps or securing loose boards. Proper ventilation is also important, as sanding generates fine dust that can spread through the home.
Taping off doorways and covering vents minimises the spread of dust to other areas. Once the space is ready, the sanding process can begin.
What type of sanding equipment is used?
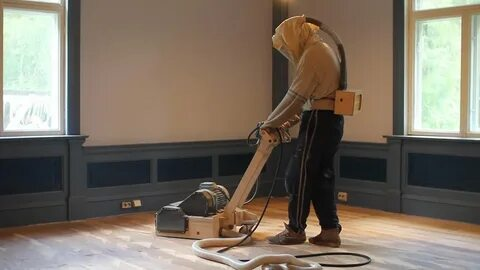
Different machines are used for different parts of the floor. A drum or belt sander is typically used for large surface areas. These machines remove old coatings and level the timber. For edges and corners, an edge sander or hand-held sander can reach tight areas that larger machines cannot cover.
Sanding is usually done in multiple stages, starting with coarse-grit paper to remove old finishes and imperfections. Medium-grit paper is then used to smooth the surface further. Finally, a fine-grit paper is applied to create an even, smooth base for polishing or coating.
Dust extraction systems can help reduce the amount of dust left behind. After sanding, the floor should be vacuumed and wiped to remove any remaining particles.
What finishes can be applied after sanding?
The choice of finish depends on the desired look, maintenance needs and level of foot traffic. Common options include oils, varnishes and water-based coatings. Each provides a different level of sheen and protection.
Oiled finishes penetrate the wood and enhance its natural character. Varnish forms a durable layer on top of the surface. Water-based coatings are often favoured for their faster drying times and low odour. It’s essential to allow each coat to dry completely before applying the next.
The number of coats needed will vary, but most floors require at least two to three coats for proper protection. Once finished, the floor should be left untouched until fully cured.
How long does the sanding and finishing process take?
Timing depends on the size of the room, condition of the flooring and drying periods between coats. A small room may be sanded in a day, while larger areas can take longer. Finishing adds extra time, especially when multiple coats are required.
Weather conditions can influence drying times. Warmer, well-ventilated rooms usually speed up the process. Allowing adequate time for each stage helps ensure a long-lasting outcome.
It’s a good idea to plan around the disruption and keep pets and family members away from the work area until the job is complete.
What care is needed after sanding and finishing?
Freshly sanded and coated floors need gentle care to maintain their appearance. Avoid moving heavy furniture over the surface too soon and use felt pads on chair and table legs. Regular sweeping or vacuuming prevents dirt and grit from scratching the finish.
Spills should be cleaned promptly with a damp cloth. Harsh chemicals and abrasive tools can damage the surface, so mild cleaning products are best. Over time, recoating may be needed to refresh the finish and protect the timber.
Conclusion
Floor sanding made easy: what homeowners need to know is that preparation, the right equipment and proper finishing all play vital roles in achieving a smooth and durable result. With thoughtful planning and care before, during and after the process, timber floors can be restored to their original charm and enjoyed for many years to come.